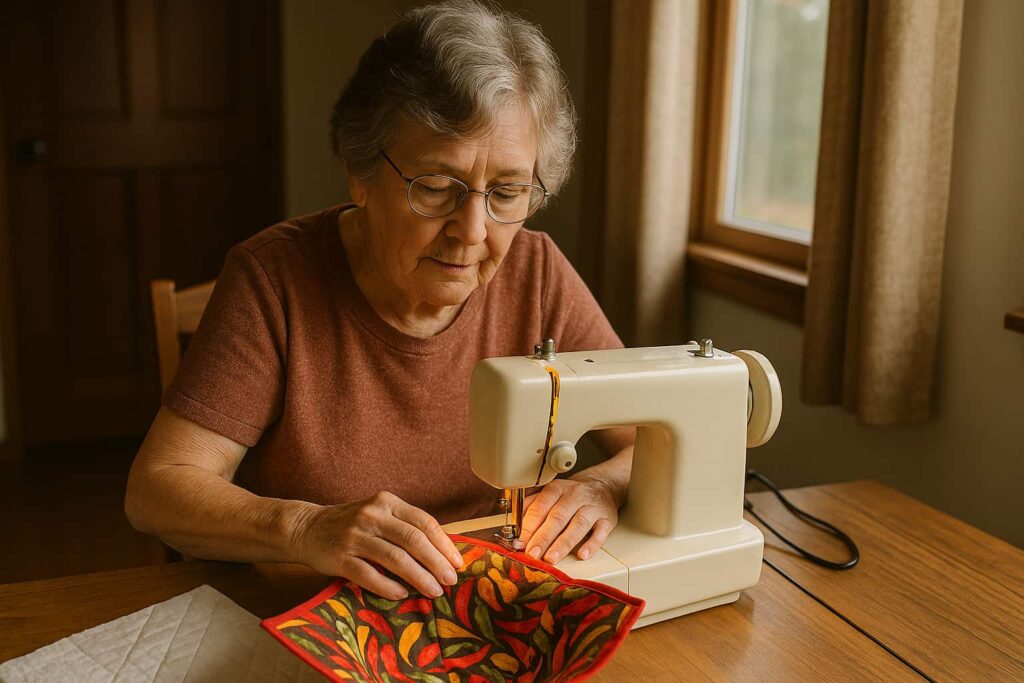
Let me tell you a little secret: bowl cozies might just be the most beloved handmade gift I’ve ever created for my family.
It started about eight years ago when I was tired of burning my hands on hot soup bowls fresh from the microwave.
What began as a simple solution for our own kitchen quickly became the most requested gift from friends and family.
My kids still reach for their personalized bowl cozies every single time they heat up leftovers, and honestly, watching them use something I made with my own hands never gets old.
These little fabric wonders are incredibly practical – they protect your hands from hot bowls, keep your food warmer longer, and they’re absolutely adorable sitting on your kitchen counter.
How to Sew a Bowl Cozy?
Best of all, once you get the hang of making them, you can sew one up in under 30 minutes.
Trust me, after making dozens of these over the years, I’ve learned all the tricks to make the process smooth and enjoyable.
The Magic of Batch Sewing
Before we dive into the actual sewing, let me share one of my favorite time-saving secrets: batch sewing.
If you’re anything like me, once people discover you can make bowl cozies, you’ll suddenly have a list of requests longer than your arm!
Instead of making them one at a time, batch sewing will save you hours and keep you sane during the holiday gifting season.
Here’s how batch sewing works: instead of completing one bowl cozy from start to finish, you do each step in batches across multiple projects.
For example, if you’re making six bowl cozies, you’d cut out all 12 fabric squares and 12 batting pieces at once. Then you’d mark all the quilting lines on every piece.
Next, you’d quilt all pieces, then mark all the darts, stitch all the darts, and finally assemble all the cozies.
I discovered this method during my first Christmas of bowl cozy-making madness when I had 15 to complete in two weeks.
What would have taken me nearly eight hours doing them individually took just over four hours using batch methods.
Plus, you get into a rhythm with each step, making your stitching more consistent and your technique smoother.
Essential Materials and Tools
The key to a successful, microwave-safe bowl cozy lies entirely in your material choices.
I cannot stress this enough: if you want your bowl cozy to be microwave-safe, you absolutely must use 100% cotton everything.
This means 100% cotton fabric, 100% cotton batting, and 100% cotton thread in both your needle and bobbin.
Materials for one bowl cozy:
- Two 10½-inch squares of 100% cotton fabric
- Two 10-inch squares of 100% cotton batting (I swear by Pellon Wrap & Zap)
- 100% cotton thread
Tools you’ll need:
- Fabric scissors and small snips
- Rotary cutter and self-healing mat
- Acrylic ruler (6×24-inch works perfectly)
- Fabric marking pen
- Wonder clips or pins
- Bone folder
- Iron and ironing board
- Sewing machine with 90/14 needle
Pro tip: I always keep a dedicated 90/14 needle just for bowl cozies. You’ll be stitching through multiple layers (two fabric pieces, two batting pieces, plus seam allowances), and that heavier needle makes all the difference in preventing skipped stitches.
How to Sew a Bowl Cozy? Step-by-Step Instructions

Cutting Your Pieces
Start by cutting two 10½-inch squares from your cotton fabric and two 10-inch squares from your batting. I like to cut my batting slightly smaller because it gives me a bit of wiggle room when centering it on the fabric – nothing worse than having batting peek out at the edges!
Creating the Quilting Foundation
Lay one fabric square face down on your cutting mat. Center one piece of batting on the wrong side of the fabric – you should have about ¼ inch of fabric showing around all edges. Using your ruler and fabric marking pen, draw a diagonal line from the top left corner to the bottom right corner, then draw another diagonal line from top right to bottom left. You’ve just created an “X” across your batting.
Repeat this process with your second fabric and batting square. This quilting step isn’t just decorative – it keeps your batting from shifting around inside the finished cozy.
Quilting the Pieces
Now comes the satisfying part! Set your machine to a longer stitch length (I use 3.0mm) and stitch along each marked line. Start at one edge and stitch straight across to the opposite edge, then repeat for the second line. The longer stitch length prevents puckering and gives your cozy a more relaxed, handmade feel.
Expert tip: Don’t worry about backstitching at the beginning and end of these quilting lines – they’ll be secured when you stitch the perimeter later.
Marking and Stitching the Darts
Here’s where bowl cozies get their signature shape! Fold one quilted square in half with right sides together, keeping the fold on your right and raw edges to the left.
Measure 1 inch from the fold along the raw edge and make a mark. Then measure down 2 inches from the top along the fold and make another mark. Draw a diagonal line connecting these two points.
Flip your folded fabric over (keeping the fold on the right) and repeat the marking process. You’ll stitch along these marked lines using a shorter stitch length (2.4mm) and remember to backstitch at the beginning and end.
Unfold your fabric and refold along the other set of raw edges. Mark and stitch two more darts exactly the same way. When you’re finished, you’ll have four darts per quilted square.
Pro tip: I like to starch my fabric lightly before marking darts – it makes the fabric hold its fold better and gives you more accurate markings.
Assembling Your Bowl Cozy
Place one quilted square right side up and the other right side down on top. This is where “nesting” your seams becomes crucial. At each dart, fold the bottom fabric’s seam allowance toward the right and the top fabric’s seam allowance toward the left. They should butt up against each other snugly – this is what creates those perfectly matched points that make your bowl cozy look professionally made.
Starting just above one dart, stitch around the entire perimeter using a 3/8-inch seam allowance. You’ll pivot slightly at each dart and make sharp turns at each corner. Remember to leave a 2-3 inch opening for turning – I usually leave this opening along one straight edge rather than near a corner.
Finishing Touches
Clip your corners to about 1/8 inch and clip on both sides of each dart, being careful not to cut your stitching. Turn your cozy right side out and use a bone folder to push out those corners crisply. There’s something so satisfying about seeing those perfect points emerge!
Press your entire cozy with the iron on cotton setting, making sure to press the seam allowance inward at your turning opening. This pressing step is crucial for professional-looking topstitching.
Topstitching for Durability
Set your stitch length back to 3.0mm and topstitch ¼ inch from the edge around the entire perimeter. Then stitch a second row about ½ inch from the edge. When you reach corners, stop with your needle down, raise your presser foot, rotate the fabric counter-clockwise, lower the foot, and continue. At darts, I like to stop with the needle down in the middle of the dart seam, raise the foot, and slightly adjust the fabric so everything lies flat.
This double topstitching not only closes your turning opening but also adds durability and gives your bowl cozy that finished, professional appearance.
Frequently Asked Questions
Why must I use 100% cotton materials?
Synthetic materials can melt in the microwave, creating dangerous hot spots and potentially toxic fumes. Cotton is naturally microwave-safe and will never compromise your family’s safety.
Can I use just one layer of batting?
Absolutely! While I show two layers in this tutorial, one layer of batting works perfectly well and actually makes the cozy easier to turn and manipulate. Use whatever feels right for your intended use.
What if I want rounded corners instead of square?
Use any round object – a dinner plate, bowl, or even a large lid – as a template. Place it on the wrong side of your fabric at each corner and trace around the curve before cutting.
My darts don’t line up perfectly. What am I doing wrong?
This usually happens when the fabric shifts during dart stitching. Try using more clips or pins to secure your fabric before stitching, and double-check your measurements before drawing each dart line.
A Gift That Keeps on Giving
There’s something deeply satisfying about creating something beautiful and functional with your own hands. Bowl cozies make wonderful gifts because they’re practical, personal, and show that you’ve taken time to create something specifically for that person.
I love pairing finished bowl cozies with a little care card explaining that they’re microwave-safe and machine-washable.
Over the years, I’ve made bowl cozies in every fabric imaginable – from elegant Christmas prints for my mother-in-law to superhero themes for my nephew.
Each one carries a little piece of love stitched right into the seams. Once you master this technique, you’ll find yourself looking at fabric sales in a whole new way, already envisioning the bowl cozies you could create.
So gather your materials, set aside an afternoon, and prepare to create something that will be used and treasured for years to come. Happy sewing!